This information is for those who want to work with the Panasonic SD700/TM700 progressive 1920x1080 footage in GrassValley Edius 5.
You can easily import MTS clips from the camcorder into your HD projects, and they will play interlaced, but without any other problem. The Canopus AVCHD2HQ Utility will also correctly convert the original footage to the Canopus HQ format.
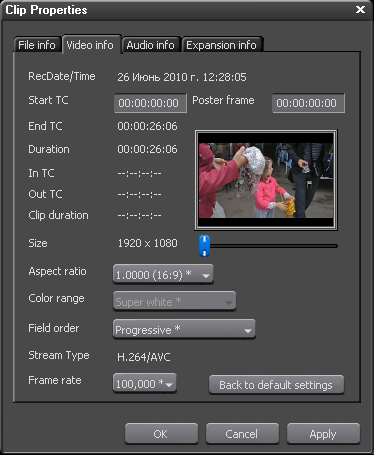
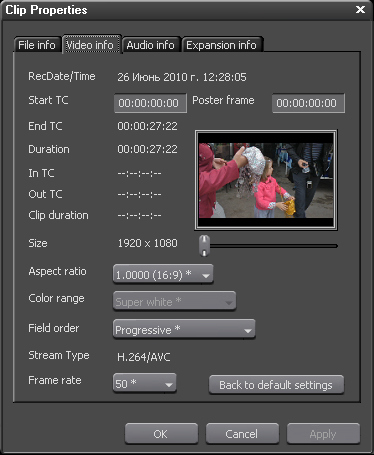
The problem begins when you want to trim the original out-of-camcorder files without recompression. You can use the Panasonic HD Writer AE 2.1, supplied with the camcorder, or, as I do, the tsMuxeR, which is freeware. Both programs put some wrong information to the headers of the trimmed M2TS files. As a result you will get wrong clip properties when you import a trimmed clip into Edius:
Notice the 100 fps frame rate above.
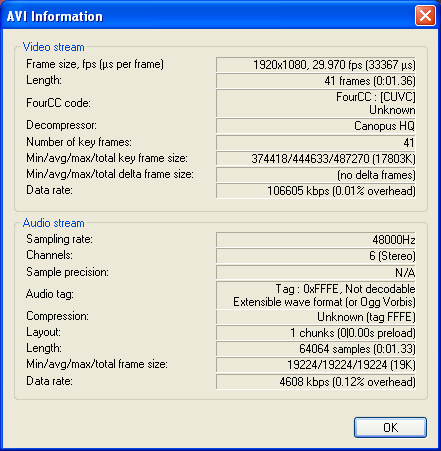
If you try co convert a trimmed clip with the Canopus AVCHD2HQ utility, it will freeze operation after a while. When you open the fragment of the resulting Canopus HQ AVI file with VirtualDubMod, you, again, will see a wrong frame rate, in my case 29.97 fps instead of 50 fps:
Let's compare the headers of the original clip and the one trimmed with HD Writer. Here is the header of the MTS file straight from the camcorder:
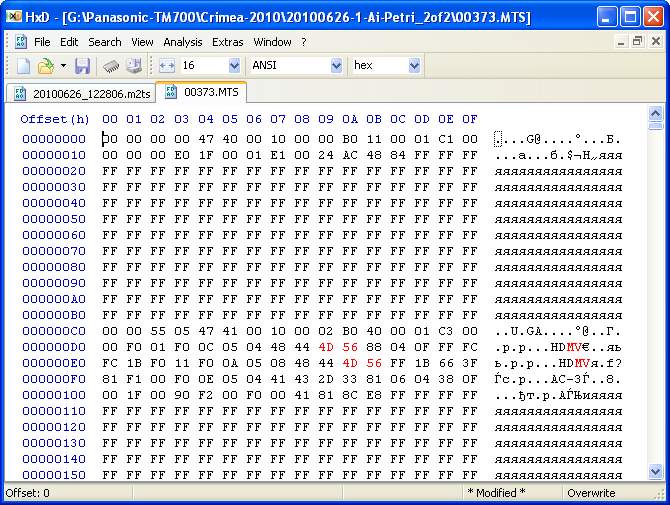
There are two instances of the string HDMV in the header. Now look at the header of the clip trimmed with HD Writer:
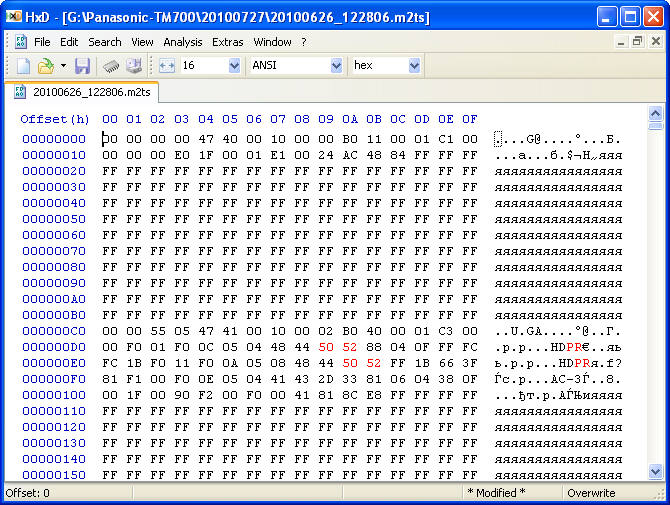
Here we see the string HDPR instead of HDMV, and this is the only difference that matters. Replace the PR instances with the MV, and the trimmed clip will open normally both in Canopus AVCHD2HQ and in Edius:
What I don't like about the HD Writer is that it somehow clips and shifts audio track. That is why I experiment with tsMuxeR, which gives better results. In fact, using the workaround below, 50P clips trimmed with tsMuxeR have neither visual nor audible differences from the relative portions of the original clips.
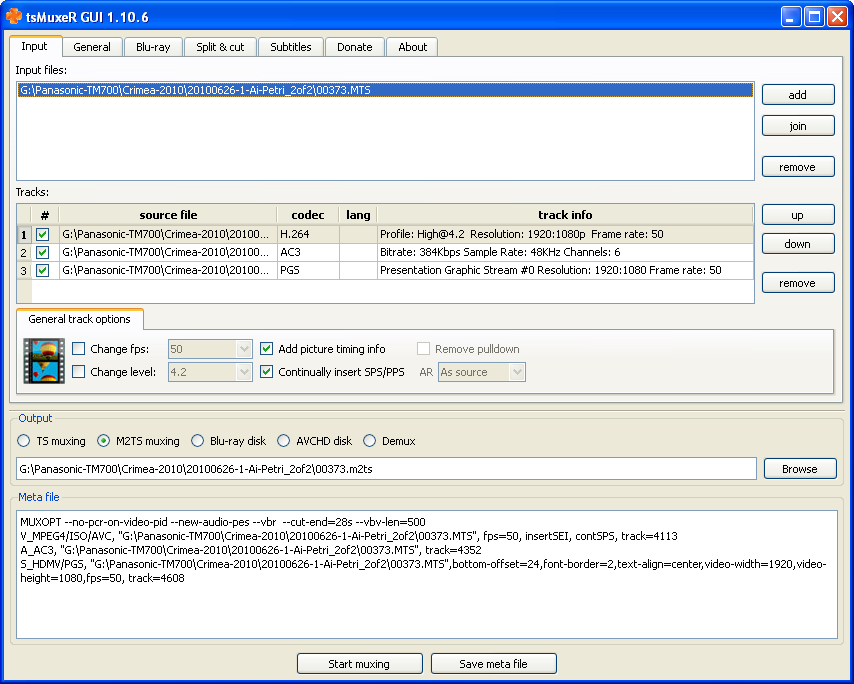
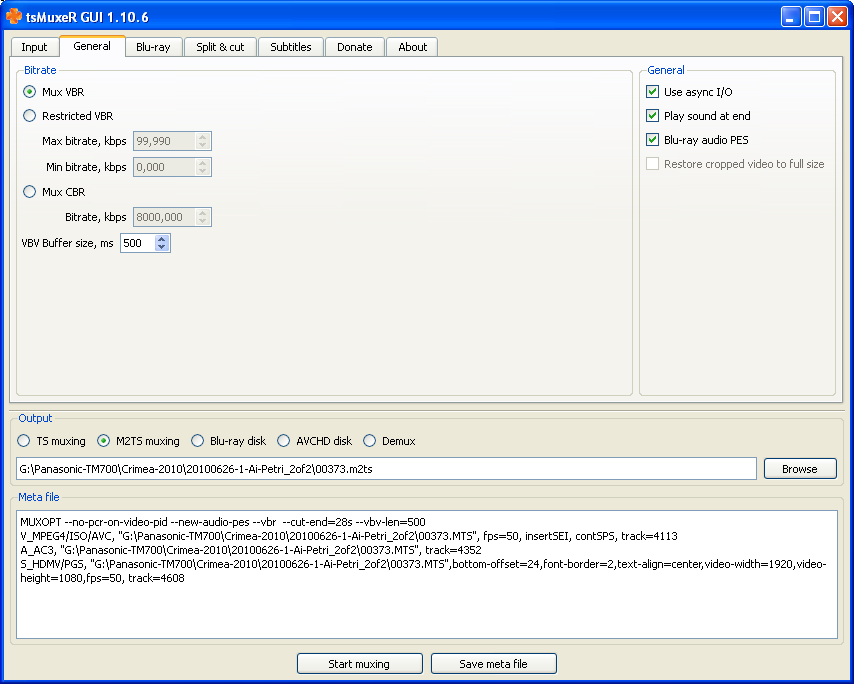
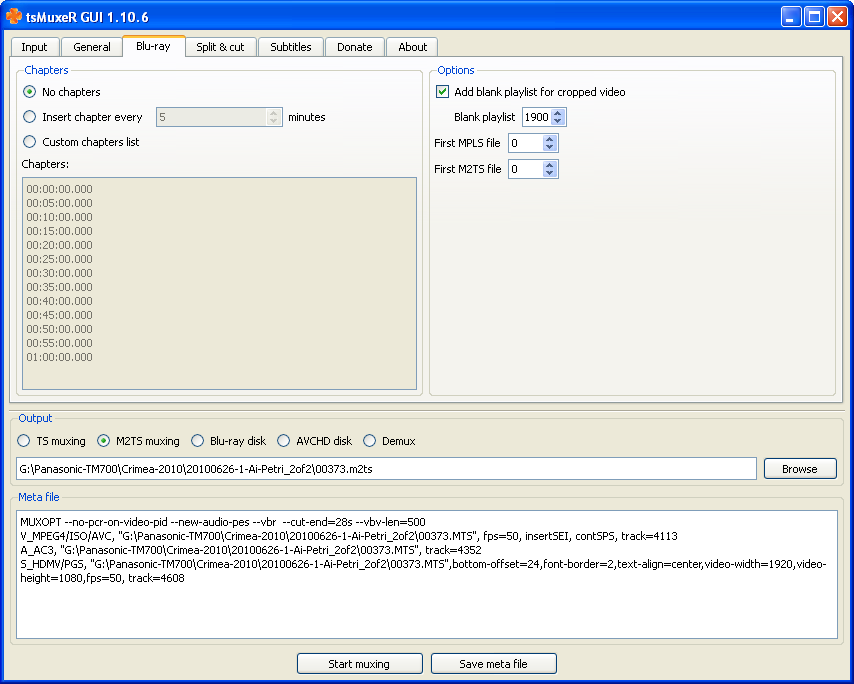
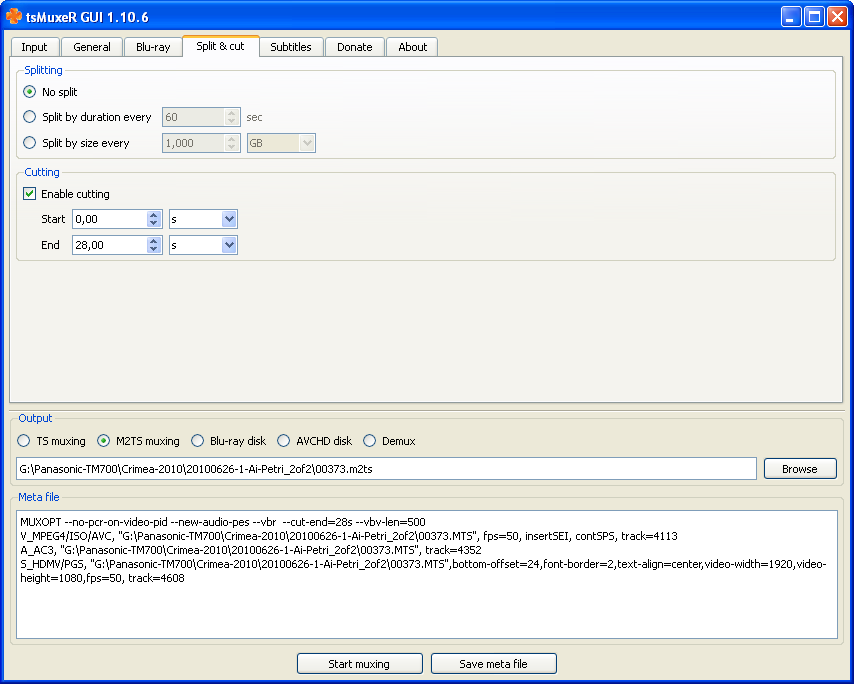
How do I trim a clip with tsMuxeR? Watch the settings tab-to-tab:
Now let's compare the headers of the original clip and the one trimmed with tsMuxeR:
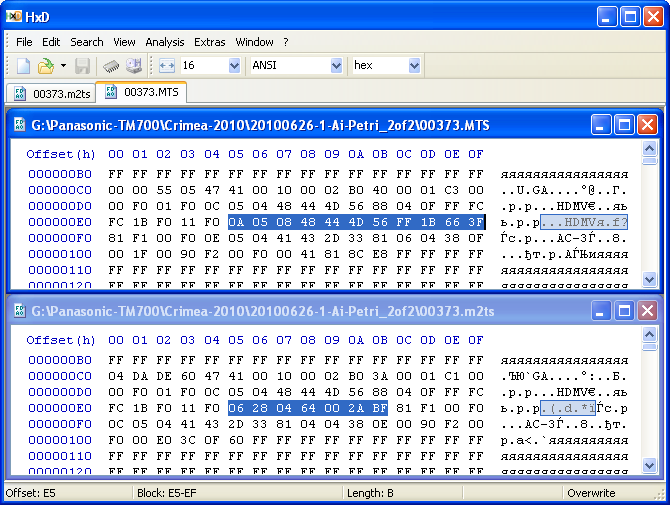
The differences in the properties of the video tracks are highlighted. I do not know the meaning of the highlighted characters, and I can only guess that the byte at position E7 keeps the number of bytes to follow, but I am going to replace the ones in the trimmed clip with the ones taken from the original clip. First of all I will need to right-shift the audio track properties by 4 bytes. Look, I just selected the audio properties and copied them to the buffer:
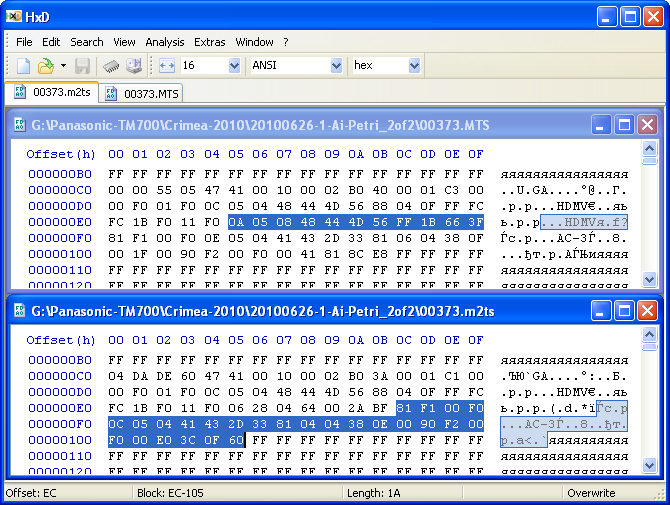
Then I paste-write the copied bytes to position F0:
Now I copy the 11 bytes from the original header:
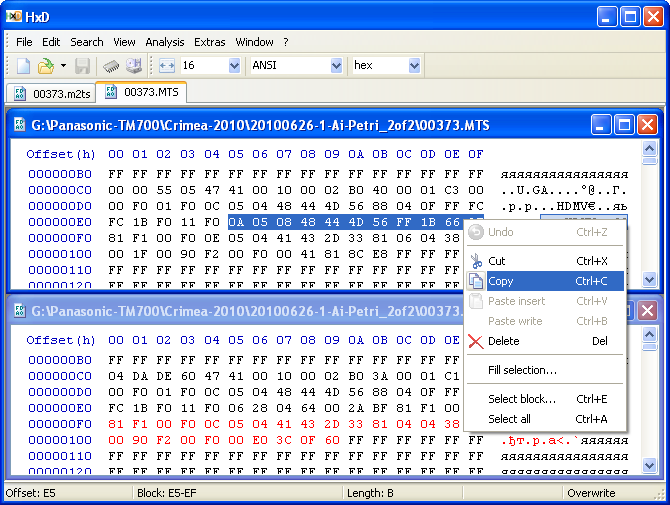
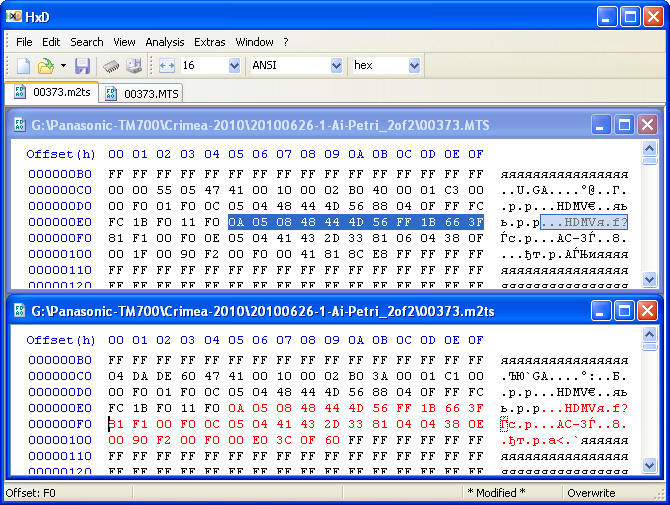
And paste-write them to replace the relevant bytes in the trimmed header (at position E5):
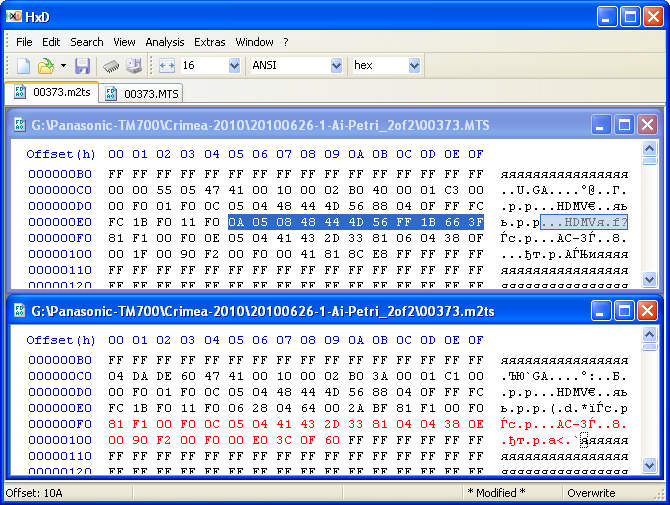
One more thing to notice is that the byte at position CB looks like the length of the whole video+subtitles+audio properties block. Look at the status bar at the word Length:
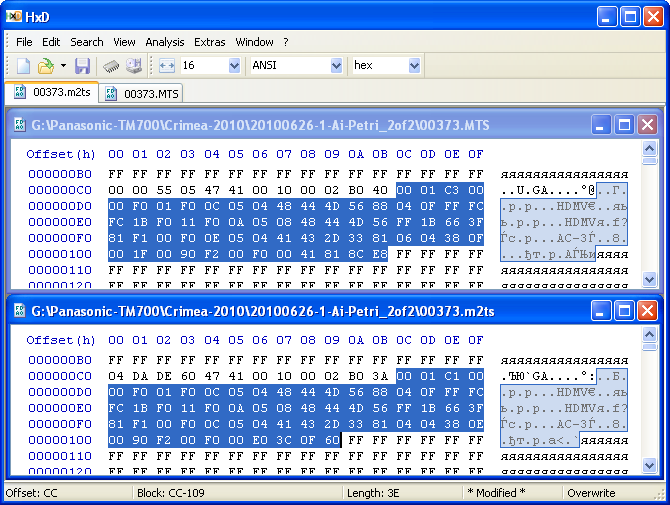
Because I have expanded the properties block by 4 bytes, I am going to replace the value 3A with 3E and save the edits:
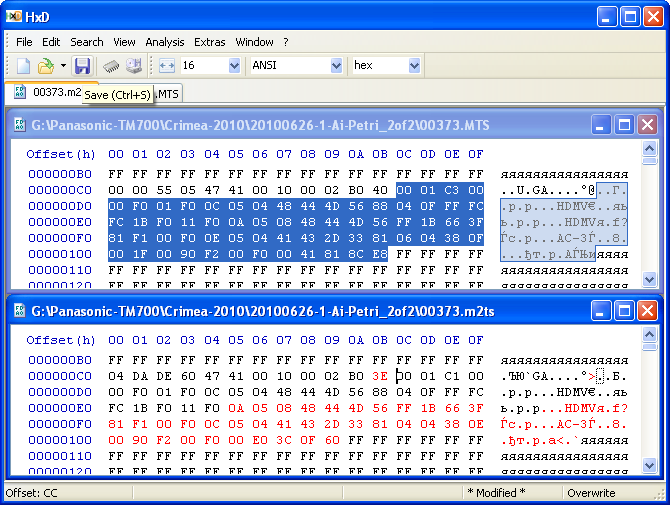
That's it. Now the trimmed file is compartible with Canopus.
If you want to tell where I am doing wrong, or you know the meaning of the headers, or you have any comment, please send me a message to khizhiy at yahoo.com.
Sergei Khizhiy, 27.07.2010.